Showing posts with label nomnoms. Show all posts

NomNoms: Epic Gingerbread (Two Ways)

Say what? A non-This-Week-in-Geekdom post? I'm getting to the point in this not-semester's worth of studying where burnout is beginning to loom large. The brain takes in a tableau of equations for the umpteenth time, turns in on itself and meekly requests, "Could we please just not right now?"

It's been...ehm...a few years since undergrad, but I've found that I revert readily to what had once been tried-and-true study break behavior. This primarily takes the form of baking; it's edible chemistry! It's also a great way to address any and all cravings. In my case, it was the desire for the deep, spice-laden flavor of gingerbread even though the holidays have come and gone. The following recipes both began at one of my favorite online purveyors of make-your-own deliciousness, SmittenKitchen.com, and got a few tweaks partially borne from chemistry and partially due to the availability of ingredients I had on hand. 

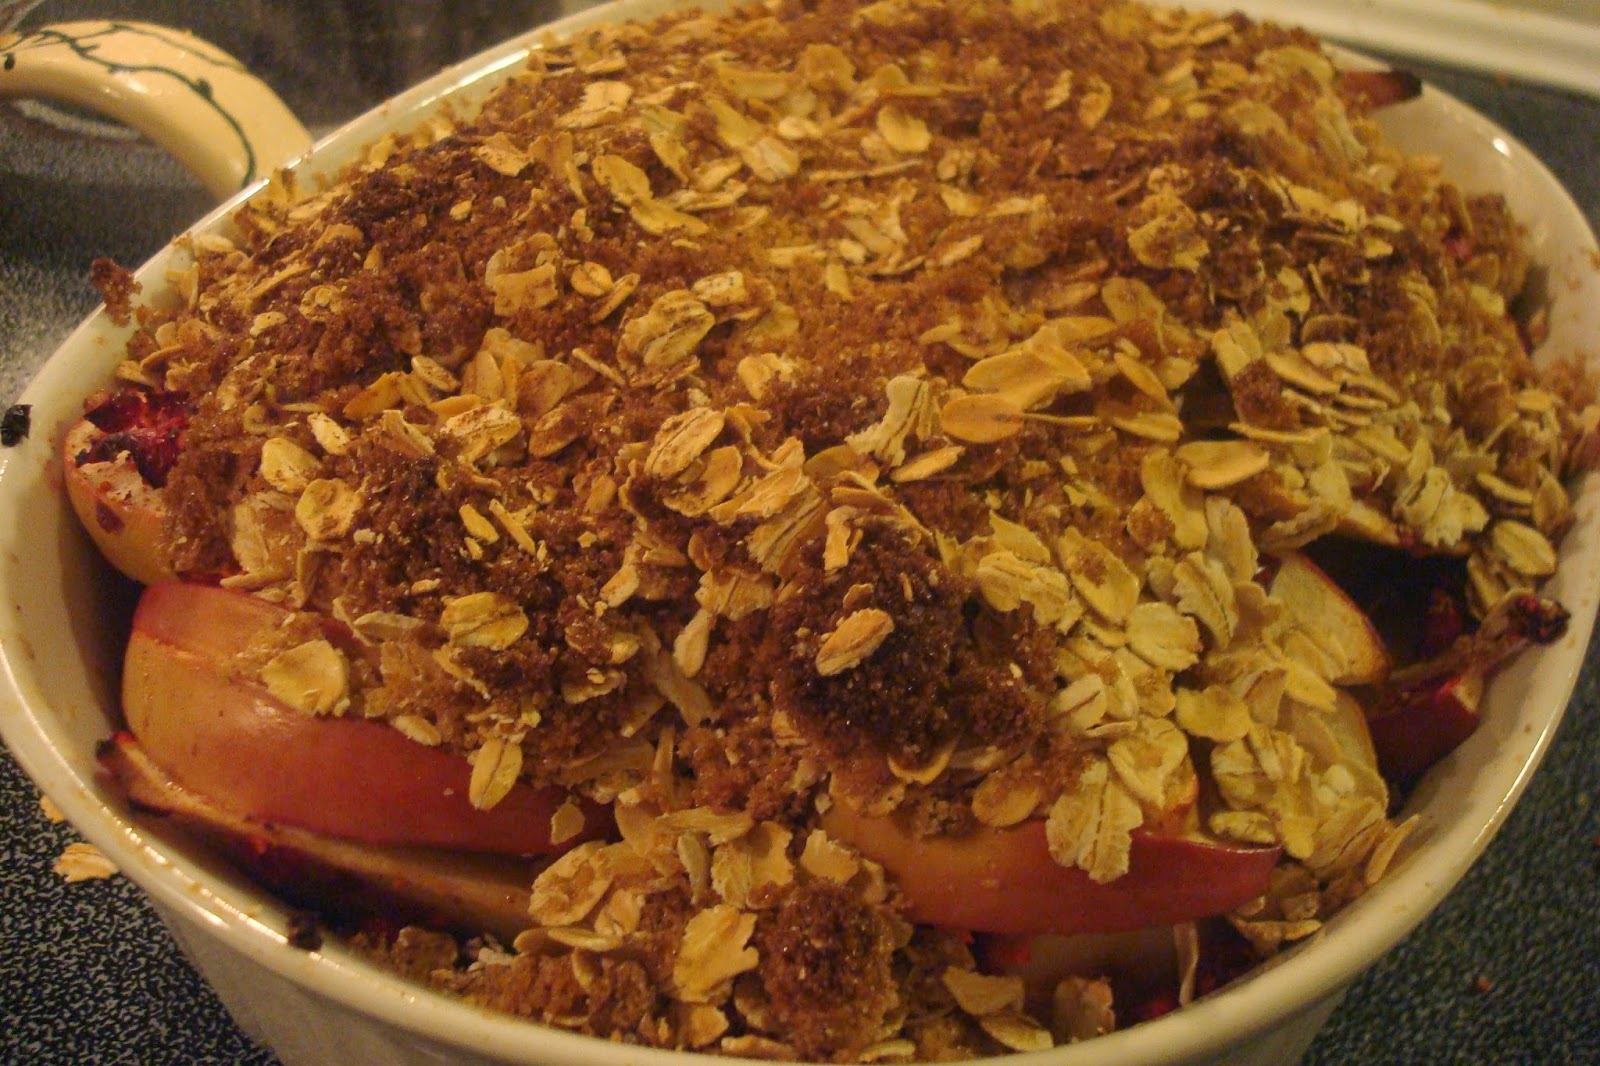
Both recipes are a little involved, but yield some seriously bold, fluffy, cakey gingerbread. Bonus: your kitchen will be redolent with awesome for several hours post-baking. 


Difficulty: Medium
Availability of Ingredients: Common
Gadgetry: None
Feeds: 6-10 nerds
Time Till Noms: 60-75 minutes, but at least 30-35 of those minutes are passive while the gingerbread bakes.
Required Equipment: A saucepot, a large glass or other heatproof bowl, a heatproof mixing spoon, measuring cups, measuring spoons, a large glass or metal baking pan.
Optional Equipment: A spice grater, a sifter

Ingredients
1 cup of water
1.5 teaspoons of baking soda
8 Tablespoons of unsalted butter, plus a few more if you're using them to grease your pans.
2/3 cup of brown sugar 
1 cup unsulfured molasses (not blackstrap)
2.5 cups flour, plus a little more if you're using it to flour your pans
2 large eggs brought to room temperature
2 teaspoons ground ginger
1.5 teaspoons ground cinnamon
0.5 teaspoons ground cloves
0.5 teaspoons ground nutmeg 
0.5 teaspoons of salt
2 teaspoons baking powder
A small quantity of confectioner's sugar for dusting over the finished bread
Parchment paper or cooking spray
1 Tablespoon of freshly ground ginger (optional)

*heat your oven to 350 degrees (176.67 Celsius) 

Step 1) Line your baking dish with parchment paper, then butter and flour the dish. Alternatively, you can coat it liberally with your cooking spray. If you're using spray, you may want to give the measuring cup that will be holding the molasses a spritz, as this will help release all of the sticky goodness later. Cut the remaining butter into small chunks and, if you haven't already, bring your eggs out so they can come up to room temperature.

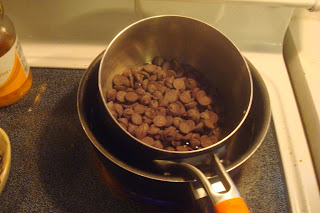
Step 2) In your saucepot, bring the water to a rapid boil, then add your baking soda. This will produce a fun fizzy/foamy reaction for a few seconds. Woo, chemistry! Remove the water/soda mixture from the heat source and leave it to stand for five minutes.


Step 3) Once your soda-water has settled, add your butter into the mix and swirl everything together until the butter has completely melted. From here, add the brown sugar and molasses and stir until you have a nice, homogeneous mixture. If you're using fresh ginger, now would be the time to grate that over your saucepan and incorporate that into the mixture.


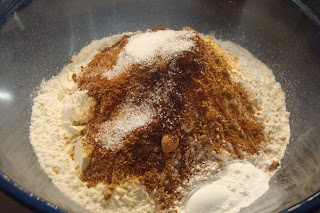
Step 4) Add the following to your heatproof bowl: the flour, baking powder, salt, cinnamon, cloves, ground ginger, and nutmeg. If you have a sifter and want to get fancy, you can sift these together or, if you're really into not doing dishes and your saucepan is large enough, you can sift these directly into the saucepan. If your saucepan isn't quite big enough, pour the contents of it onto the dry ingredients in your heatproof bowl and stir until until everything is uniform.


Step 5) If the resulting mixture feels hot to the touch, let it cool for 10-15 minutes. If it doesn't, add your eggs and give everything one last good stir to ensure homogeneity.

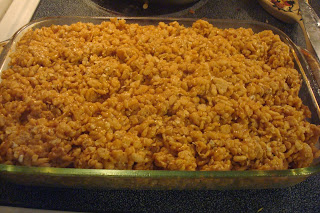
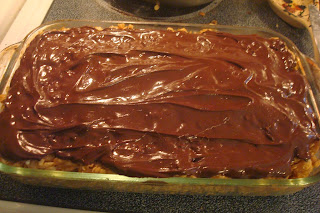
Step 6: Pour your batter into your baking dish, then bake for 30-35 minutes. Once the gingerbread has finished its sojourn into the oven, let it cool completely. If you'd like, you can sprinkle some confectioner's sugar over the top once the gingerbread is cool to the touch. Yay!


Difficulty: Hard
Availability of Ingredients: Somewhat Common
Gadgetry: None
Feeds: 6-10 nerds
Time Till Noms: 70-85 minutes, but up to 50 of these minutes are passive as the gingerbread bakes.
Required Equipment: A saucepot, a large glass or other heatproof bowl, another mixing bowl, a heatproof mixing spoon, a whisk, measuring cups, measuring spoons, a glass or metal baking dish.
Optional Equipment: A bundt pan, a spice grater, a sifter

Ingredients

1 cup of Irish dry stout or oatmeal stout (I used Guinness stout and it worked very well)
0.5 teaspoons of baking soda
1 cup brown sugar 
1 cup granulated sugar
1 cup of unsulfured molasses (not blackstrap)
2 cups flour
1.5 teaspoons of baking powder
2 Tablespoons of ground ginger
1 teaspoon of ground cinnamon
0.25 teaspoon ground cloves
0.25 teaspoon ground or freshly grated nutmeg
a pinch of ground cardamom
3 large eggs, brought to room temperature
0.75 cups of vegetable, canola, or safflower oil
Parchment paper or cooking spray
A small amount of confectioner's sugar for dusting over the finished bread

*heat your oven to 350 degrees (176.67 Celsius) 

Step 1) Line your baking dish with parchment paper, then butter and flour the dish. Alternatively, you can coat it liberally with your cooking spray. If you're using spray, you may want to give the measuring cup that will be holding the molasses a spritz, as this will help release all of the sticky goodness later. **Note: if you're trying to make this in a bundt pan, be especially liberal with the buttering/flouring. This batter ends up extremely sticky.**

Step 2) In your saucepan, combine your molasses and stout, then bring that mixture to a boil. Once it's boiling, add your baking soda, stir, and remove the whole shebang from your heat source.

Step 3) Add to your heatproof bowl the flour, baking powder, ginger, cinnamon, cloves, nutmeg, and cardamom. Stir these gently to combine.

Step 4) Add the three eggs and both types of sugar to your other mixing bowl. Whisk these together, then add your oil and whisk that into the mix as well. 

Step 5) Give the molasses and stout mixture a quick feel test. If it's close to room temperature (or at least isn't hot), then add the contents to the bowl with the eggs/sugar mixture and stir everything together. Once you have a homogeneous blend, toss that in with the flour and spices. Stir the whole shebang together until everything is uniformly combined. 

Step 6) Pour the resulting batter into your pan and give the pan a few sharp raps on your countertop to eliminate any air bubbles that may have formed. Place the pan in the oven and bake for 30-40 minutes if you're using a rectangular baking dish and 50 minutes if you're using a bundt pan.

Step 7) Once the gingerbread has finished its sojourn into the oven, let it cool completely. Sprinkle some confectioner's sugar over the top once the gingerbread is cool to the touch. Yay!


FAQs

Does it matter what type of brown sugar I use?

Not really. Dark brown sugar tends to jive a little better with the ingredients in these recipes, but there's no real reason why you couldn't use light brown sugar. Just ensure that it's brown sugar you're using and not, say, cane or some other form of raw sugar.

Why shouldn't I use blackstrap molasses?

Honestly you could, but your gingerbread would turn out with an extremely intense, somewhat bitter flavor that would likely be overwhelming for most palettes. If you like your gingerbread to be incredibly bold and on the less sweet side, then go right ahead and use blackstrap.

What's with the boiling of liquids? Can I just skip that step and add those ingredients directly to the others?

This step is what gives the gingerbread its fluffy, cakey texture. If you skip it the results will be quite different than if you hadn't.


Best of luck on your kitchen experimentations!


Read More

Nomnoms! Wild Rice Soup

If this post comes out with a misspelling or two, those can almost certainly be attributed to the fact that it was written from beneath a half dozen layers of sweaters/blankets and at least one pair of gloves. Ok, I’m not actually quite so bundled up, but it’s pretty darn brisk out there right now. January has announced itself with a mighty cold snap. Temperatures in the city have managed to creep up to 20 degrees (-6.67 degrees Celsius), but we’re preparing for them to drop down to -4 (-20 degrees Celsius) as the day goes on and this looks to be the base case until this upcoming weekend. Woo winter in New England! (cue our Canadian readers laughing at our version of ‘cold’)  

Aside from thermal armor formed from layers of sweaters, there are plenty of other solid defenses against the wiles of winter. Foremost amongst these is spellbook’s worth of solid recipes that will warm you from the inside out. We talked about one of these a little while back and today I’ll share another recipe that’s low on effort but huge on flavor (also, wrapping your hands around the sides of a full soup bowl is an excellent way to warm up).

This is a hearty, heavy soup that, when accompanied by your favorite crunchy bread, can easily stand as a meal. While you can certainly follow the steps below and get a tasty result, I’ve found that if you make the soup in the morning or even the night before and leave it in a crockpot on a low setting until it's time to serve (or, alternatively, have it sit over the lowest heat on your stove for a couple hours before serving) and you’ll get an even deeper and richer flavor.   


Difficulty: Easy
Availability of Ingredients: Somewhat Common
Gadgetry: Optional
Feeds: 6-10 nerds
Time Till Noms: 60-85 minutes, but the last 15-20 minutes of that are passive. (Note, as mentioned above, leaving the soup to sit for several hours is the real secret ingredient)
Required Equipment: A large pot, a smaller pot, a cutting board, a sharp knife, measuring cups, measuring spoons.
Optional Equipment: A slow cooker/crockpot

Ingredients
1 medium-sized onion
½ pound (0.23kg) mushrooms or broccoli
½ cup celery
½ cup unsalted butter
½ cup all-purpose flour
6 cups chicken or mild vegetable broth
2 cups wild rice
½ teaspoon of curry powder
1 teaspoon of mustard powder
1 cup of half and half (milk or cream may be substituted)
¼ cup dry sherry wine
A few fingerfuls of chopped parsley
Salt and pepper to taste


Step 1: Cook the wild rice according to the instructions on the bag/box.

Step 2: While the rice is cooking, chop the onion and celery into small (0.25-0.50 inch; 0.64-1.27cm) pieces, then chop your mushrooms/broccoli into bite-sized pieces. Unlike the butternut squash soup we featured a while back, this soup does not get pureed at the end so you want your vegetables to start at a good bite size for easy spoonability.

Step 3: Add the butter to your large pot and bring the burner to a medium heat. Once the butter has completely melted, add the onion and celery. Saute these in the butter until they turn translucent. If you are using mushrooms, add them to the pot when there’s just a bit of color left in the celery.


Step 4: Once you get to the end of Step 2 slowly add in the flour, stirring constantly to ensure the vegetables get evenly coated and the flour doesn’t burn on the bottom of the pot. After all the flour has been added and incorporated, pour the broth in (also slowly while stirring constantly). This mixture will be very thick and somewhat difficult to stir at first, but it will get easier to work with as more liquid comes into play.

Step 4: After you’ve poured all the broth, add in both the wild rice and all of the seasonings (minus the parsley); stir until everything is well mixed. Toss in the broccoli if you're going the cruciferous route.

Step 5: Reduce the heat to slightly less than medium, then add both the half and half and sherry wine. Bring all the ingredients up to a uniform temperature and garnish with parsley and that’s it; you have yourself some yummy wild rice soup!


FAQs

I’ve never cooked wild rice before. Where do I get it and how do I know what to do?

Wild rice is a dense, high-protein grass seed (it’s not really rice and it has more protein than quinoa[1]) that’s characterized by its long cylindrical shape and hard, dark outer shell. Despite it not actually being rice, it’s generally sold alongside other types of rice in your grocery store. If you’ve never cooked it before, here are four ways you can do so. Or you can do what I do and use a box of this stuff, which I find provides the perfect quantity of cooked grains and comes with a seasoning blend that enhances the soup. The Far East boxed stuff also has explicit and easy-to-follow instructions.

I’m lactose intolerant/vegan, so dairy products are a no-go. Can I substitute almond, soy, or coconut milk?

Soy milk would probably be your best bet, though I imagine any of those alternatives would be ok. The half and half simply acts as a thickening agent and provides the soup with a liquid base. So long as your substitute can do those two things without skewing the flavors, it can be a one-for-one switch.

Does it matter what type of onion I use?

Not particularly. I tend to use yellow or other medium-intensity onions for this soup, but feel free to experiment if you have a favorite variety.

Best of luck with your kitchen experiments!


[1] Lustgarden, Michael. (2013). “Wild Rice: The Protein-Rich Grain That Almost Nobody Knows About!” The Whole Grains Council.
Read More

Nomnoms! Curry Butternut Squash Soup

Why hello December. You made extra sure we’re aware of just how not-summer it is right now. While all this darkness and cold may stir up the desire to hibernate, there’s an excellent culinary defense against these doldrums: warm, yummy, comforting soup. Now I’ll fully admit that I’m in no way unbiased towards soup; if left to my own devices I’d probably eat it for the majority of my meals. This is especially true once the temperature starts to drop. The nice thing about the soup featured in this post is that the recipe doesn’t involve a lot in the way of ingredients or time, but still yields a very satisfying meal. It's perfect for one of those freezing cold work nights or if you wanted to introduce something new to your game night crew.
Difficulty: Easy
Availability of Ingredients: Semi-Common/Semi-Seasonal
Gadgetry: Highly Recommended
Feeds: 4-8 nerds
Time Till Noms: About 15-30 minutes of preparation and an additional 30 minutes of cooking time

Required Equipment: a cutting board, a large glass bowl, a large cooking pot, a heavy knife or cleaver, a wooden spoon
Optional Equipment: a garlic press, a vegetable peeler, a standard or immersion blender (if not using one of these, then a vegetable masher)
Ingredients
3.5-4.5 pounds (1.59-2.04kg) of Butternut Squash
1 large shallot
4-6 medium-to-large cloves of garlic
1 quart chicken or mild vegetable broth
1 Tablespoon canola oil
1 Tablespoon of honey or agave syrup
1 Tablespoon of curry
½ teaspoon salt
¼ teaspoon of cardamom*
½ teaspoon garam marsala*
¼ teaspoon ground ginger*
A pinch of cayenne*

*optional

Step 1: Peel the squash then divide it into 1/2” (1.27cm) pieces. You want the pieces to be as small and uniform as possible; the smaller the pieces, the faster the squash will cook!

Step 2: Add the canola oil to your large cooking pot and swirl the pot around until the oil coats as much of the bottom as possible. Place the pot on the stove and turn the burner to a medium-high heat. Remove the skins from both the shallot and the garlic cloves. Dice the shallot (these pieces don’t need to be completely uniform) and add it to the cooking pot. If you’re not using a garlic press, dice the garlic along with the shallot and add them to the pot together. Otherwise, press the garlic into the hot oil after you’ve added the shallot.

Step 3: Sauté the garlic and shallot in the oil for 3-5 minutes until the shallot pieces turn translucent and the garlic becomes a golden brown color. Add the squash. Sauté the squash for 1-2 minutes, turning it frequently with your wooden spoon, just until the majority of it has been coated by the oil and the shallot/garlic has been mixed in.
Step 4: Add the broth, the salt, and the spices. Stir until the salt and spices are dissolved. Turn the burner up to a slightly higher heat (just off of high, if possible) and bring everything to a rapid boil. Allow the soup to continue boiling for 12-15 minutes, stirring the contents occasionally.
 Step 5: After Step 4 the squash should be tender (should squish easily if poked); turn off the burner and remove the pot from the heat source. Add the honey or agave syrup, then stir until it’s well blended with the rest of the soup.

Step 6: If you’re using a vegetable masher, you can use it now to mush the squash into as fine a paste as you can. If you’re using an immersion blender, lower it into the soup and blend until the ingredients are a consistent puree. If you’re using a standard blender, puree the soup in batches until all the liquid has been converted into a puree. While you can certainly eat it as soon as it cools, I’ve found that letting the soup stand for 30-45 minutes allows all the flavors come out. More flavor and less mouth burning!

A pinch of ground nutmeg and/or a dollop of plain greek yogurt are perfect garnishes for this soup. Pair it with naan or just enjoy it on its own. It’s a rich and surprisingly filling soup that will add a dash of color and keep you warm on these chilly nights.
FAQs

I’m not big on butternut squash. Can I use another vegetable?
You could probably use this same recipe with acorn squash, kabocha, or even pumpkin (or a combination of these!). The key factors are the sweetness of the squash and the dense, fleshy texture. Given that, the recipe won’t work on drier squashes, like yellow or spaghetti squash.

I’m vegan/vegetarian and will be using vegetable broth in this recipe. Is there anything I should look for when buying a broth?
You want as mild a broth as you can find; something where no one flavor would jump out to steal the attention from the squash or compete with the curry. The spices are quite strong, so you just want a good base to tie everything together.

My grocery store doesn’t carry those spices. Will it be ok to omit them?
You really only need salt, honey, and curry to get the base flavor. Everything else is just a nice bonus. 

How do I pick out a good butternut squash?
Ah, this can actually be a little tricky. When selecting a squash, you want a thick specimen that feels surprisingly heavy (relative to its size) when you pick it up. The skin should be a uniform tan-peach color and free of blemishes. It should also be very firm to the touch with no squishy spots. Lastly, you want to wait until the squashes have been available for sale for at least 2-3 weeks. The early season squashes that first appear in stores and markets tend to have very pale ‘meat’ that doesn’t have a strong flavor. You’ll need a good, mature squash for this soup.

Peeling and chopping the squash is scary! Do you have any tricks to make this less perilous for my fingers?
One thing I try to avoid is peeling the squash with a knife. While a knife will get the job done, a peeler will make things go more quickly and spare your digits. As for the actual chopping part (which I find to be scarier), I divide the entire squash lengthwise before cutting anything else so no part of it rolls away. After that, it’s a matter of having a rag or paper towels available to keep my hands dry during the chopping. The best defense against cut fingers is, ironically, a very heavy and sharp knife.
Best of luck with your kitchen experimentations and stay warm!
Read More

Nomnoms! Peanut Butter & Chocolate Rice Krispie® Treats

This post was supposed to go live several hours ago, but today ended up being full of all sorts of excitement. First there was the historic, downright mind-boggling success of the Philae lander touching down on the surface of comet 67P/Churyumov-Gerasimenko. Such precision at such an immense distance and after over 10 years hurling through the vacuum of space is truly a momentous accomplishment. Just seeing the reactions of the scientists and researchers will guaranteedly bring a smile to your face. A toast and a tip of the hat to all those involved in the Rosetta mission!
In the wake of that, it was almost too easy to miss the announcement that registration for PAX East 2015 had opened. While it hasn't been officially confirmed, the word on the street...er...word on the Twitter is that 3-day badges sold out in about 7 minutes and, as of the time this was written, Saturday badges are gone as well. The GIR and I managed to snag badges for Friday and Saturday, so we'll once again be bringing you coverage live from the floor of the BCEC.

Whew. After all that perhaps a little treat is in order. Fortunately, the recipe below is high on the yummy indulgence scale and low on the effort necessary to bring about said tasty noms. It's a bit of a twist on the classic dessert (primarily for those of us who are addicted to the combination of chocolate and peanut butter). It's fast and the results are highly transportable, so these can make for a perfect game night snack or addition to any forthcoming holiday get togethers.
Difficulty: Easy
Availability of Ingredients: Common
Gadgetry: None
Feeds: 8-16 nerds
Time Till Noms: About 15 minutes of active ‘cooking’, then about 2 hours to allow the treats to cool and harden.
Required Equipment: a large glass or ceramic serving dish, measuring cups, a wooden spoon, a medium-to-large saucepan, another medium saucepan and a medium glass bowl or smaller saucepan that can fit inside the medium one.  
Optional Equipment: a double boiler/bain-marie
Ingredients

4 ½ cups of crispy rice cereal (or the cocoa version if you wanted to double up on the chocolate)
¾ cups of minute rolled oats
1 cup granulated sugar
1 cup light corn syrup
1 cup peanut butter
1 package of chocolate chips (10 ounces)
1 cup of peanut butter chips (may be substituted for butterscotch or additional chocolate chips)
Cooking spray

Step 1: Measure out all the quantities of dry ingredients and set them within easy reach of your stove. Doing this can make this recipe exponentially easier to pull off, as there’s a brief, finite window in which to combine the ingredients and shape the treats towards the end. Use your wooden spoon to ensure that the oats are as evenly distributed throughout the Krispies® as possible. Spray both the bottom and the sides of your serving dish with cooking spray.

Step 2**: Add the granulated sugar to your saucepan, then spray your measuring cup with cooking spray. Once the cup has been coated, measure out your corn syrup and add it to the sugar. Spraying your measuring cup makes pouring the syrup much simpler. 

Step 3: Turn your burner up to a medium heat and stir the syrup/sugar mixture frequently with your metal spoon as it warms up. Once the sugar dissolves and the mixture begins to slowly bubble remove it from your heat source and stir in your peanut butter. Keep stirring until all three ingredients are well blended and you have a uniform mixture.
Step 4: Add your cereal to the sugary peanut butter concoction and keep on stirring until the former is entirely incorporated into the latter. Once everything’s all mixed pour it into your serving dish, using your mixing implement to spread it evenly throughout the pan.
Step 5: Fill your medium saucepan about halfway up with water; place the smaller saucepan/glass bowl so it floats on top of the water, then add your chocolate pieces. As the water warms up, stir the chocolate until you have a smooth, semi-liquid consistency. Pour the chocolate so it forms a layer on top of the cereal mixture. Once the chocolate has been poured, then the whole shebang sit at room temperature for about 2 hours and you'll have yourself some treats!
**Doing Steps 2-5 as written above will result in treats that are topped with chocolate. A fun variation is to melt the chocolate (Step 5) first, then do steps 2 and 3. Once you get to Step 4, pour out half the cereal mix into the serving dish, add a layer of melted chocolate, then add the other half of the cereal mix on top. Having the chocolate in the middle is a great way to vary textures and flavors, especially if you are making thicker treats.

FAQ

I'm allergic to/otherwise can't eat rice. Can I make these with another cereal?
Sure thing. The cereal here is more for texture, with the chocolate and peanut butter doing the heavy lifting in terms of flavor. Any puffy cereal will work here, just make sure it's not highly sweetened.

I see that you used smooth peanut butter here. Can I sub in a chunky or crunchy variety?
Definitely. I used the smooth type just because that's what we had in the house. There's no reason why you couldn't use a different type.

Can I use natural peanut butter ?
Yes. This recipe doesn't have the same structural dependencies as the chocolate peanut butter eggs or  the peanut butter frozen yogurt, so the liquidy texture that you'll usually see in natural peanut butters is actually a boon. Since we have to melt the butter down, using a less solid base can actually cut down on your "cook" time.

What about almond/cashew/other type of nut butter? Are those ok to use?
Yep. Feel free to use any of those or, if you're feeling particularly fancy, maybe experiment with making custom blends.

Are whole rolled oats ok to use?
Sort of, but not really. The oats have two functions in this recipe: provide some fiber and prevent the cereal portion of the treats from hardening into a barely-chewable brick. The more-refined texture of minute oats allows the grains to practically disappear into the treats, but still allows them to do both parts of their job. If you can only get your hands on whole oats, I'd recommend running them through a food processor for a few seconds or giving them a coarse chop with a broad knife.

Corn syrup is gross! Do I have to use it?
Well, you don't have to use it, but the results will change based upon what you use as a substitute. Agave syrup or even a light grade maple syrup might be ok to use, but either of those are actually going to be sweeter per ounce than the corn syrup. If you do use one of those, you may want to start out with less granulated sugar to preserve the flavor balance in the end product.

As always, best of luck to you with your kitchen experimentations!
Read More

Nomnoms! Apple Cranberry Crisp

You know what we haven’t had in half-past forever? A recipe. Amidst all the changes that have been going on in here, the poor Kitchen Codex has gone without any post love. Well that’s about to be remedied. Now that those of us in the Northern Hemisphere are in the thick of autumn, we have access to the ingredients for the cold weather version of this summer dinner substitute…er…I mean dessert.
Cranberries are one of those ingredients that easily grabs the eye, but tend to stymie many cooks. That discomfort is one of the reasons why the berries end up in the same three or four time-tested places year after year (namely in the form of juice or gelatinous sauce). Fear not though, for the cranberry is a fun fruit that’s also chock-full of vitamins, minerals, fiber, and polyphenols. The active compounds in this diminutive berry have been at the center of a number of studies linking said compounds to an enhanced ability to fight the formation of kidney stones[1] and a possible diminished risk of developing certain types of cancer[2].

Fresh cranberries are often sold loose by the pound/kilo or in pre-packed bags. In either case, you’re almost certain to find the berries in the produce section of your local market (usually between late September and late December). A good berry will have a vivid red hue, unblemished skin, and will be pretty firm to the touch. The firmness part is the biggest determinant of whether or not you’ve got a good berry on your hands. A very healthy, tasty berry will bounce if you drop it onto a hard surface. This is actually a method that cranberry farmers still use to test their crops!

Bouncing berries aside, this is a recipe that’s low on the difficulty but big on flavor. It tempers sweetness with tartness and packs plenty of crunch. Bonus: it will leave your kitchen smelling spicy and delicious for hours after the crisp has finished baking. It makes for a nice pick-me-up on dark and rainy fall days.
Difficulty: Easy
Availability of Ingredients: Seasonal
Gadgetry: None
Feeds: 4-8 nerds
Time Till Noms: About 30 minutes of preparation and an additional 25-35 minutes of baking time
Required Equipment: a cutting board, a large glass bowl, another small bowl, a sharp knife, a wooden spoon/spatula, a cheese grater, a medium-sized glass or ceramic baking dish
Optional Equipment: an apple slicer, a food processor, a fruit zester, a citrus press

Ingredients

For the Filling

5-6 large-to-medium sized apples
2/3 cup of chopped cranberries
The zest and juice of half of 1 lemon (potential substitution: the zest and juice of half of 1 orange)
1/4 teaspoon of each of the following spices: cinnamon, nutmeg
1/4 teaspoon of fine salt
Non-stick cooking spray

For the Topping

1 cup of brown sugar
1.5 cups of whole, rolled oats
A few shakes of cinnamon and nutmeg
¼ teaspoon of fine salt
4 Tablespoons of melted, unsalted butter

**Pre-heat your oven to 425 degrees Fahrenheit (218.33 degrees Celsius)**

Step 1: Cut all of the apples into slices approximately ¼” (0.64cm) wide. An average apple should yield 20-24 slices. Put all of these into your large glass bowl, then add the zest and juice of your lemon (or orange).

Step 2: Using either your sharp knife or a food processor, chop the cranberries into coarse pieces, then add the pieces to the apple slices. Add the salt and spices to the mix, then stir the contents of the bowl until the berries and spices are as uniformly distributed as possible.
Step 3: Coat the bottom of your baking dish with a thin coat of non-stick cooking spray. Transfer the apple-and-berry mix to your baking dish, smoothing the mix with your wooden spoon so it lies evenly in the dish.
Step 4: Add the brown sugar, rolled oats, and spices to your smaller bowl and, using a fork or other utensil, toss the contents together so the resulting mix is as uniform in consistency as possible. Gently shake the mix over the apple cranberry base, covering the latter with the former as evenly as you can.

Step 5: Melt the butter* (you can do so either on your stovetop or in a microwave), then drizzle it over the crisp. Place the crisp in the oven and bake for 25-35 minutes (until the topping is a golden brown). Let the finished product cool for at least 10-15 minutes before serving. Woot! You have yourself some apple cranberry crisp!

*Alternatively, you can break up your butter into small pieces, then toss them together with the dry ingredients of the topping. Either method will produce a yummy, crunchy top layer.
FAQs

Does it matter what kind of apples I use?
Not particularly. I’d recommend using apples with firm flesh (these may be labeled as ‘great for baking’ at your market) or at least making firm apples the majority component of your mix. Using more than one kind of apple can be a fun way to experiment and add depth to your flavor.

Do I have to use apples? Can I use pears instead?
You can definitely substitute pears so long as they’re hearty enough to hold up to baking. Most varieties of pear pair well with cranberries (sorry, couldn’t help myself). D’Anjou pears are a good starting point if you’re thinking of going this route. Also, mixing apples and pears can be an interesting take on this recipe.

Do you peel the apples/pears before slicing them?
I don’t peel any of the fruit in this recipe, but that’s a personal preference rather than a necessity. If you don’t like the taste or texture of the peels, feel free to remove them.

Do I have to use whole oats? Can I use minute or steel-cut oats instead?
Definitely, though you may have to add 5-10 minutes to your baking time or blend rolled/minute oats in if you're using steel-cut oats. After a bunch of trial-and-error, I've found that most types of oats will work and you could probably attempt this recipe with other types of whole grains.

Have fun with your kitchen experimentations! Also, don’t hesitate to give us a shout if you have any questions or if you’d like to share photos of your finished dishes.


[1] McHarg, T., Rodgers, A., and Charlton, K. (2003). “The Influence of Cranberry Juice on the Urinary Risk Factors for Calcium Oxalate Kidney Stone Formation.” BJU Int. 92(7): 765-8. DOI: 10/1046J.1464-410X.2003.04472
[2] MacLean, MA. Scott, BE., Deziel, BA., Nunnelley, MC., Liberty, AM., Gottschall-Pass, KT., Neto, CC., Hurta, RA. (2011). “North American Cranberry (Vaccinium macrocarpon) Stimulates Apoptotic Pathways in DU145 Human Prostate Cancer Cells in Vitro.” Nutr Cancer. Jan; 63(1) 109-20. 

Read More
Older Posts Home