


We’re less than 30 days out from PAX East! Ok, I’ll admit a good portion of this excitement is directly derived from the fact that it’s been nearly a year since I’ve set foot in a formal convention, but making the costume for PAX East has been pretty fun in its own right. Since the lineup for PAX only includes one costume, I’ve been able to give each piece of this ensemble all sorts of attention (which has come in handy when building the eponymous Transistor sword).
The sword will get its own post in the very near future. For this entry we’ll focus on everything that’s not a prop, accessory or makeup, which leaves us Red’s dress, bodice and coat. Let’s start with the dress. From the trailer and what play footage has been made available thus far, we know that Red begins the game wearing a floor-length Jazz Era-inspired evening gown that becomes tattered after she is attacked by unknown assailants. This sundered version of her previously glamorous attire becomes her uniform for the remainder of the game.
| Classy and badass; that's why we love Red. |
Another course might be to take an existing dress with the desired features and altering it to match your reference images. I chose this option only because this dress appeared amongst my Amazon daily deals. It was cheap, had the right features, and could be at my door in two business days. Win all around. (Important note: the exact dress I used for this tutorial is no longer being made, but this dress is an excellent substitute).
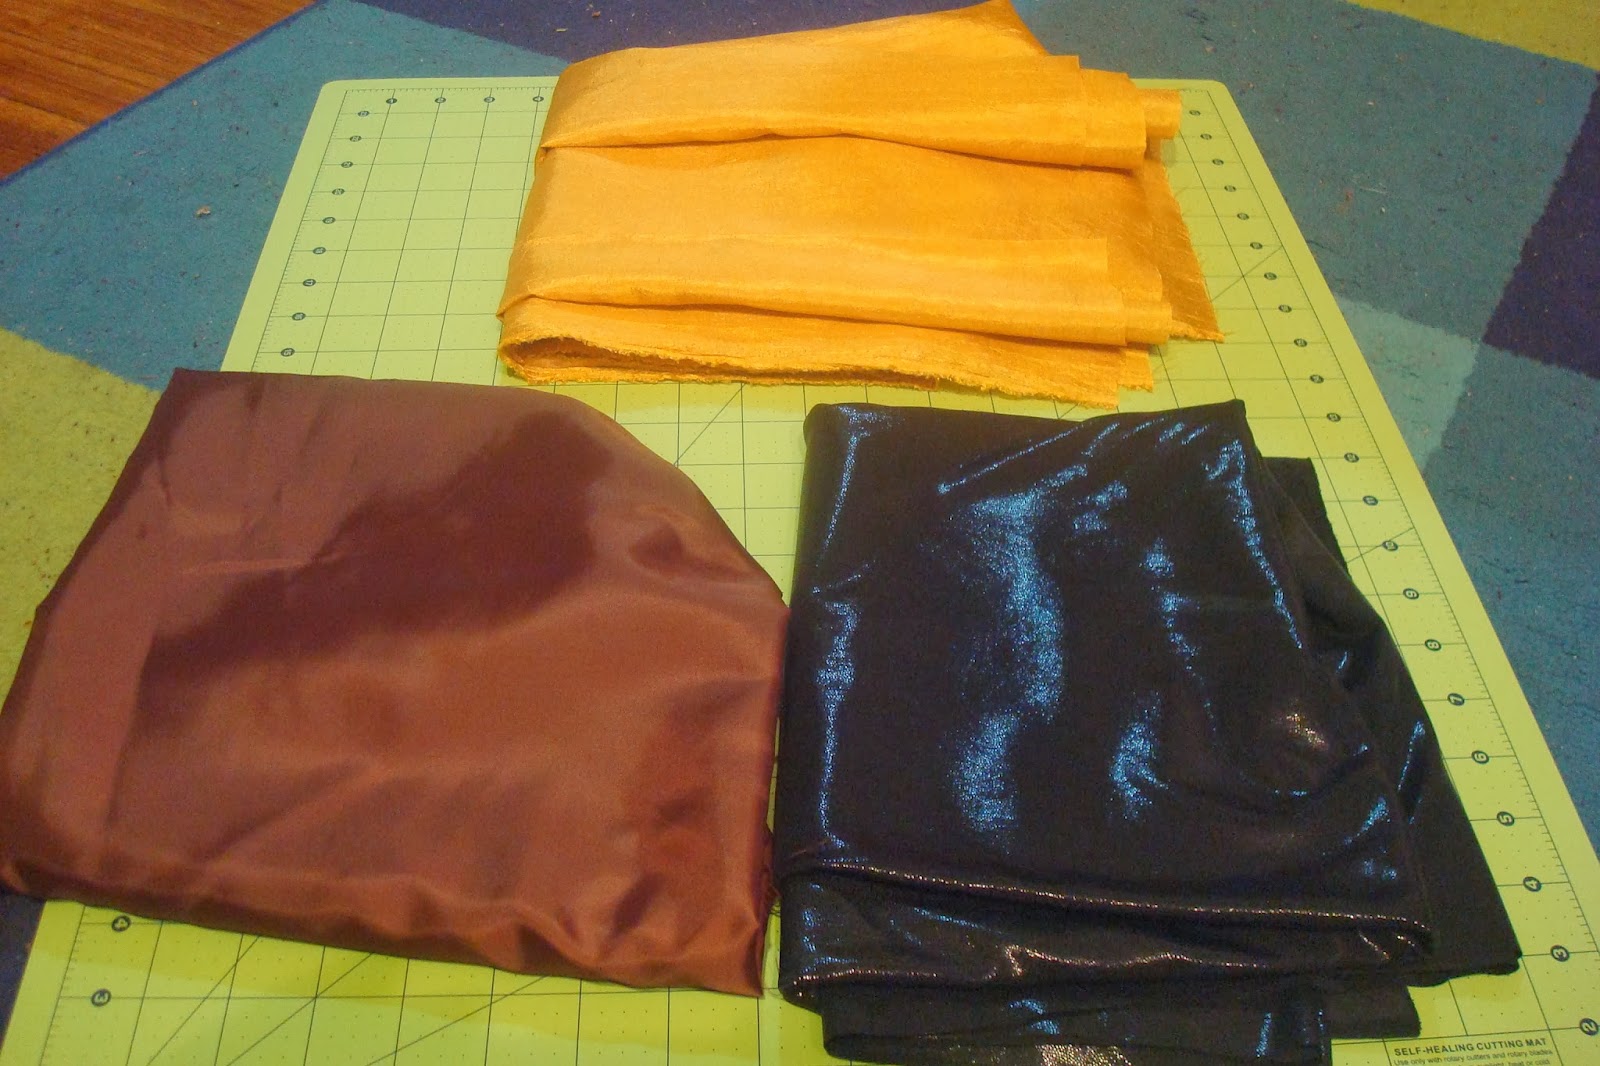
Once you’ve decided how you’ll be crafting the dress, the next decision should be what fabric you’re going to use. In our reference images, we can see that Red’s dress has a bit of a sheen to it and, as mentioned above, flows around her as she moves. This makes sense given that it was originally a very formal evening gown, so the intent is to give the impression that the costume is made from very high quality fabric. Of course, we don’t need to actually use high-end materials or, if you decide that you want your costume to be extra authentic, you can get away with using small quantities of more expensive cloth. I bought two yards of this “silkessense” fabric in gold and half a yard of this crepe back satin in chocolate (my apologies to those out there who use the correct measuring system metric units, but I’m not sure how lengths of fabric are quantified for you). You could get away with buying only a quarter of a yard for the brown cloth, as it’s just used for the accent stripes on the top portion of the dress.

I refitted my Amazon purchase with the gold silkessense using a modified blind stitch to attach the finer fabric to the existing seams of the dress. If you’re using this technique, focus on the support seams on the shoulders and neckline. For the skirt, I cut 8 rectangular panels of silkessense, then, after some trial and error, tacked each panel to the dress just below the natural waistline. The idea behind using panels rather than a single length of fabric was that the individual rectangles could be shaped or distressed once they were sewn onto the dress, giving the skirt that tattered look we see in the reference images.
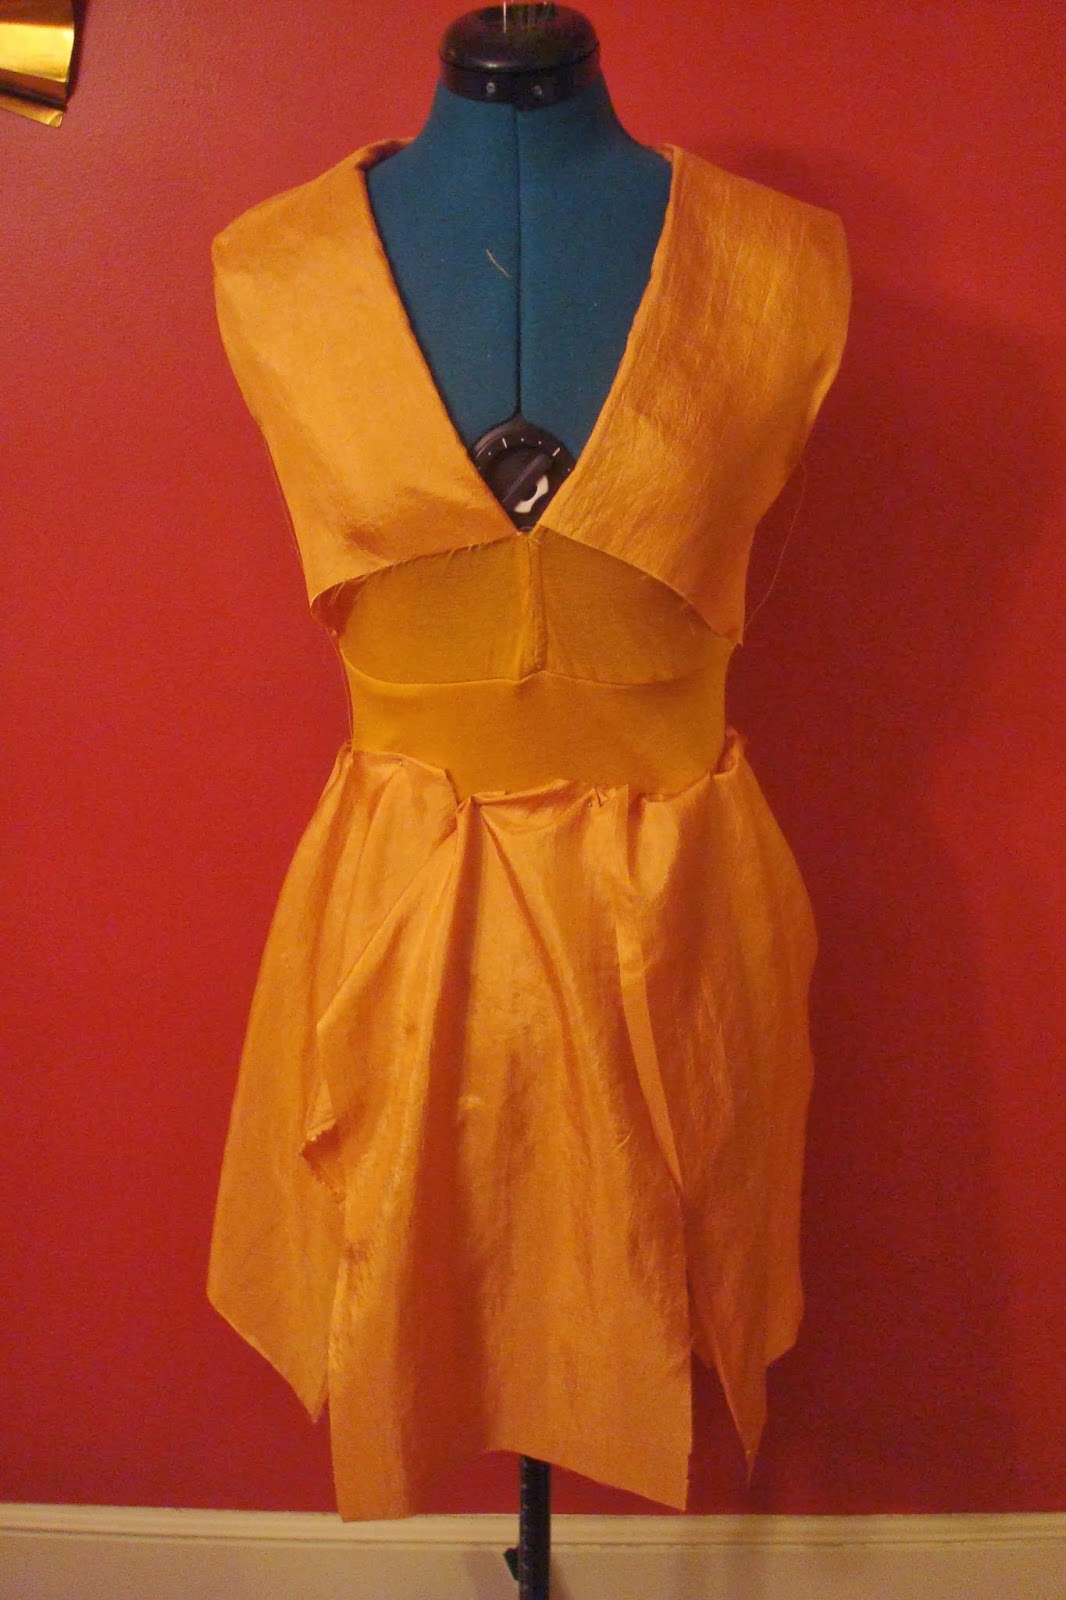
As you can see from the process photos, you don’t have to extend your re-facing efforts to the entire dress if you don’t want to, since the bodice will cover the entire middle section. Limiting where you’re applying new fabric can help cut costs or allow you to spring for real silk if you were so inclined.
After you have the base of the dress completed, you can add on the brown accent stripes. The stripes themselves are your brown cloth cut into 1” (2.54cm) wide strips. Depending on what kind of fabric you use for this, you may have to finish the edges before adding the strips to the dress. A running stitch or fabric glue will adhere the strips. The reference images indicate that you only need 3 or 4 stripes placed on a diagonal, parallel to the neckline of the dress.
After this, the only outstanding feature of the dress is the dramatic, almost Elizabethan feathered collar. The key to the collar is to have underlying support for the feathers that is lightweight, but can also hold a shape while being part of a garment. Making a stuffed, almost pillow-like collar out of fabric is one option, but this is less accurate to the reference images, which depict a whisper-thin ruff on Red’s dress. I chose to use pliant foamstock, which, as you might guess, is something like cardstock, but is made from flexible foam. Since it’s extremely light, you can layer foamstock and not add a ton of heft. I added a few lengths of higher gauge floral wire between the layers of foamstock to help the collar stand upright even as I move around while wearing the dress. Hot glue works brilliantly with foamstock by the way. Once you have the foundation for the ruff, it’s just a matter of applying a layer or two of white feathers (keeping the nibs pointing downward and the fluffy tufts pointing up towards your head).
So that’s the dress; on to the bodice. Red wears a black waist cincher that begins under her bustline and tapers to a soft point just above her hips. How you approach the bodice echoes back to our earlier discussion about corsets and how to choose a garment appropriate for your needs. Basically it’s a matter of Do You Need the Waist Cincher to Actually Cinch? If not, it’s a simple matter of cutting a length of black cloth (can be just about any fabric so long as it’s matte) and adding a set of two concentric yellow triangles at the front and center. If you do want the bodice to pull into your body, then an underbust corset is a solid choice.
If you’re tackling the latter, this is an excellent starting point. The site is especially good if you’re new to pattern drafting, corset-making, or both. It’s actually not as scary or time consuming as it sounds, but probably isn’t something you want to begin less than two or three weeks before a convention. You can also buy a simple underbust corset and make a cloth slip to create a uniform surface, then add your triangles. Whether you’re making a faux-cincher out of cloth or a functional underbust corset you have pretty much free reign to add whatever fasteners you want to close it, as the back will be entirely covered by the coat.


And that, my friends, is the foundation of the Red costume. I’ll go into makeup, accessories, and, of course, the sword over the course of the next few weeks. If you’re also building a Red costume and have a question or even if you just want to say hi, hit up any of the blog’s social media pages!
I wanted to follow this tutorial, but the Amazon link is broken. Does anybody know what dress it linked to?
ReplyDeleteIt seems that the dress I used to make this costume is no longer being made. This dress is a good substitute though: http://www.amazon.com/gp/product/B014OSGAEI?keywords=yellow%20dress&nodeID=1045024&qid=1448373976&ref_=sr_1_140&sr=1-140
DeleteWell done !! Keep it up
ReplyDelete